
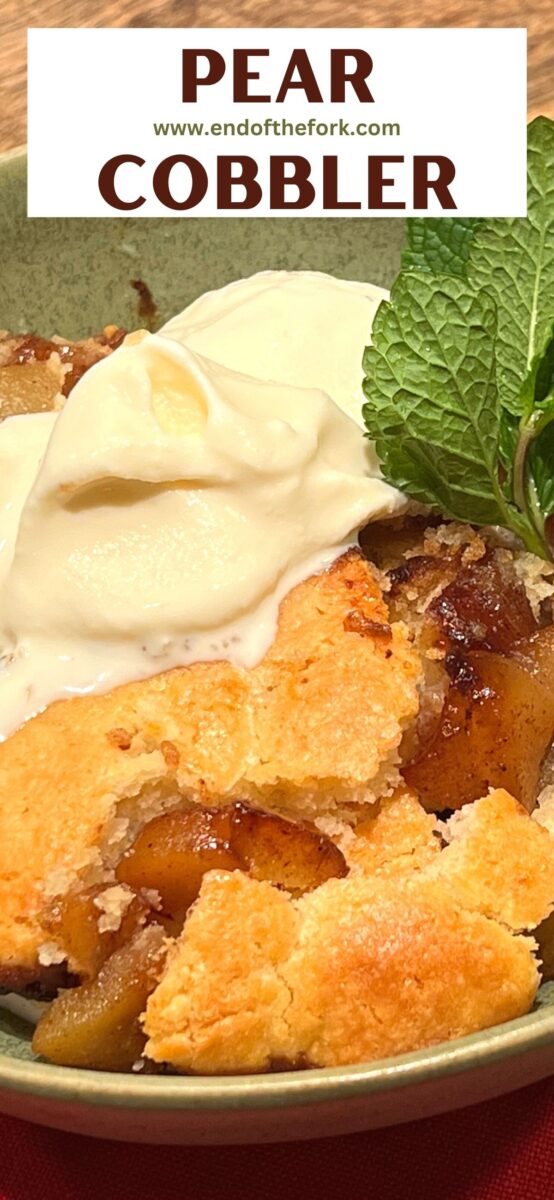
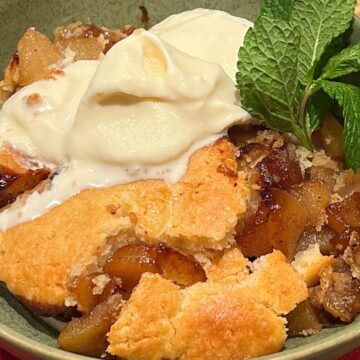
Warm up with our comforting pear cobbler with spiced juicy sweet pears topped with soft and tender biscuits.

Pear cobbler is the ideal comforting dessert to see you through the cold winter months.
This is an easy baked dessert consisting of a layer of sweet spiced pears with a soft and tender biscuit topping.
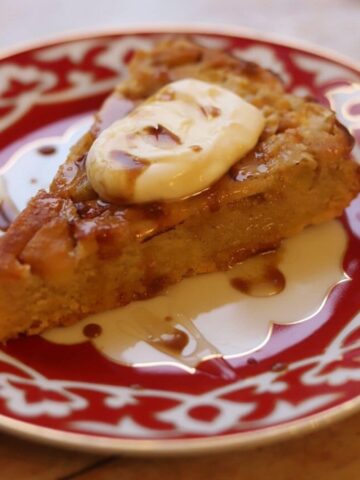
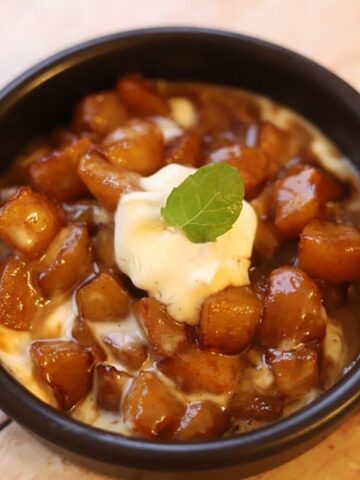
We love it warm with a scoop of vanilla ice cream or Italian custard on the side.
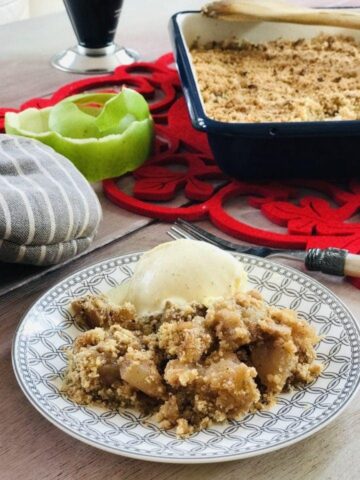
A similar recipe is our apple crumble which has a slightly more dense crumb topping.
Check out the differences between a cobbler, crisp and crumble below.
Click on the Subscribe button above to get more recipes like this to your inbox.
Jump to:
Cobbler vs crisp vs crumble
As we have many readers from the US and UK we thought we should define what each one is.
Cobblers, crisps and crumbles are all made with a layer of fruit at the bottom, the difference being in their toppings.
A cobbler is made with a biscuit topping which is a little crisp on the outside with a cake-like interior.
Biscuit topping is made in much the same way as a crumble except it has a raising agent such as baking powder or baking soda/bicarbonate of soda.
It is mixed into a dough before shaping into biscuits which are then placed in random fashion as if ‘cobbled’ together over the layer of fruit.
A crumble is baked with a thicker crumb topping made when butter is rubbed into the flour mixture, it looks similar to process shot 6 below.
A crisp topping is also crumbly but is made with oats instead of flour and does not use raising agents.
TL;DR A biscuit topping is light and tender while crisp and crumble toppings are slightly chewy.
We think all three are absolutely yummy!
Helpful tips on ingredients
These are some helpful tips on the ingredients you will need:
For the filling:
- fresh pears – ripe pears are perfect but even slightly unripe are will do. Select pears that will have a slight bite and hold their shape when cooked such as the Anjou, Bartlett, Bosc, Concorde or Conference varieties.
- butter – we like to use salted butter to enhance the other flavours in the filling.
- light brown sugar – we tried this recipe using dark brown sugar and while it gave a delicious rich flavour it released more moisture and made the filling a little runny.
- lemon juice – for a little tanginess
- ground cinnamon – the all important spice!
For the sweet biscuit dough:
- all purpose flour -no need to sift before using, simply scoop out the required amount.
- white sugar – granulated
- baking powder – helps the biscuits rise and makes them airy and light.
- cold butter – we use salted butter to enhance the flavours here too. If using unsalted, add a pinch of salt to enhance the flavours.
- buttermilk – gives a soft and rich dough.
See recipe card below for quantities.
Step by step instructions
Follow these step by step instructions.
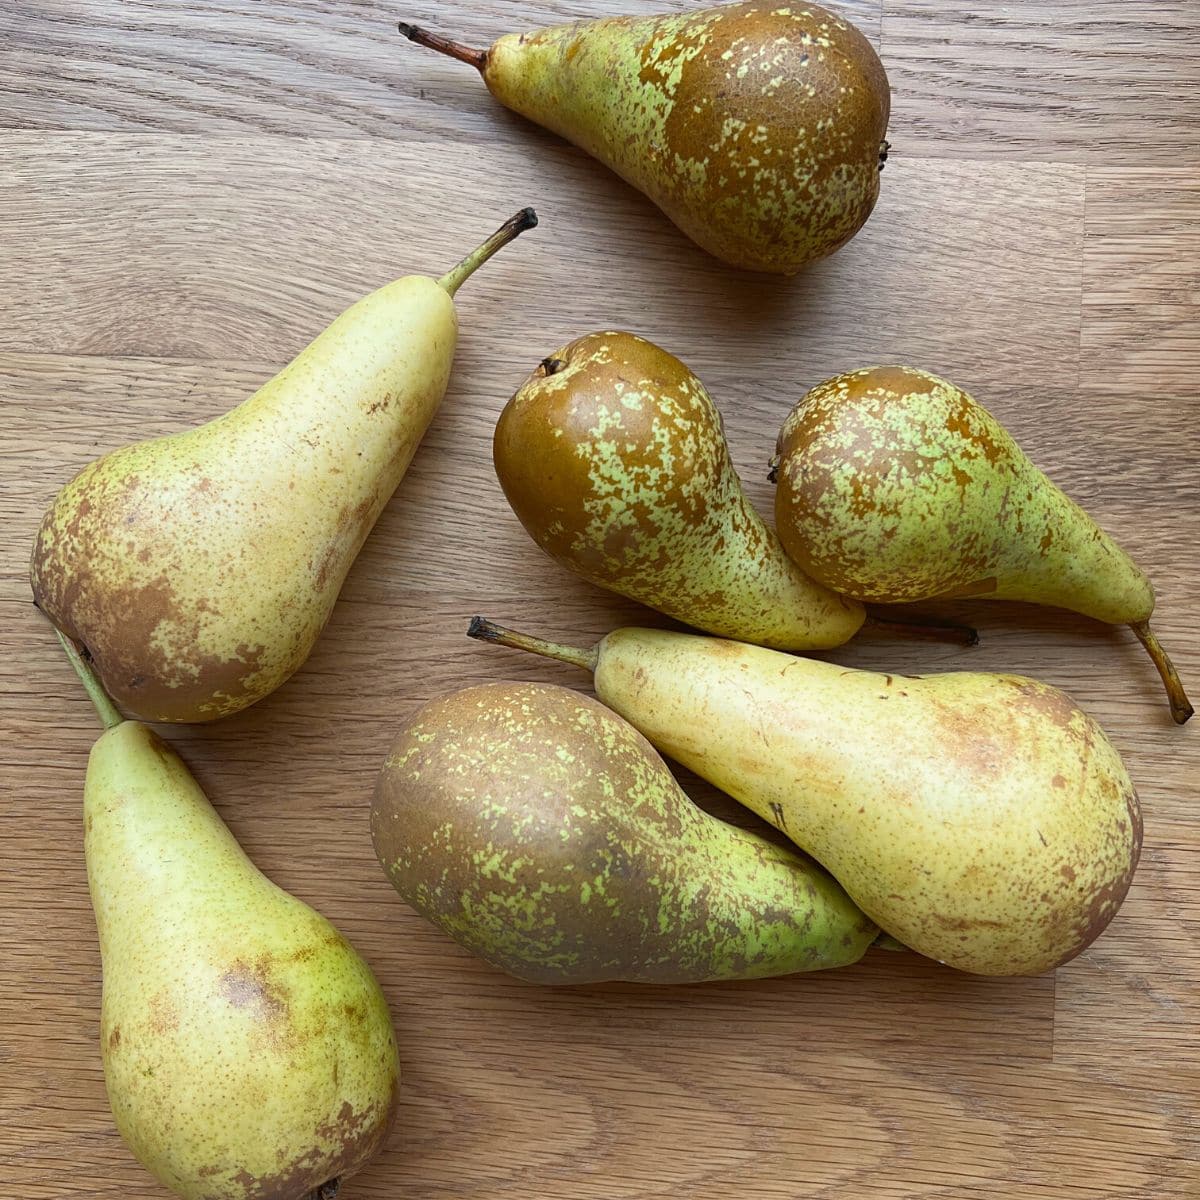
- Wash, dry and dice fresh pears.
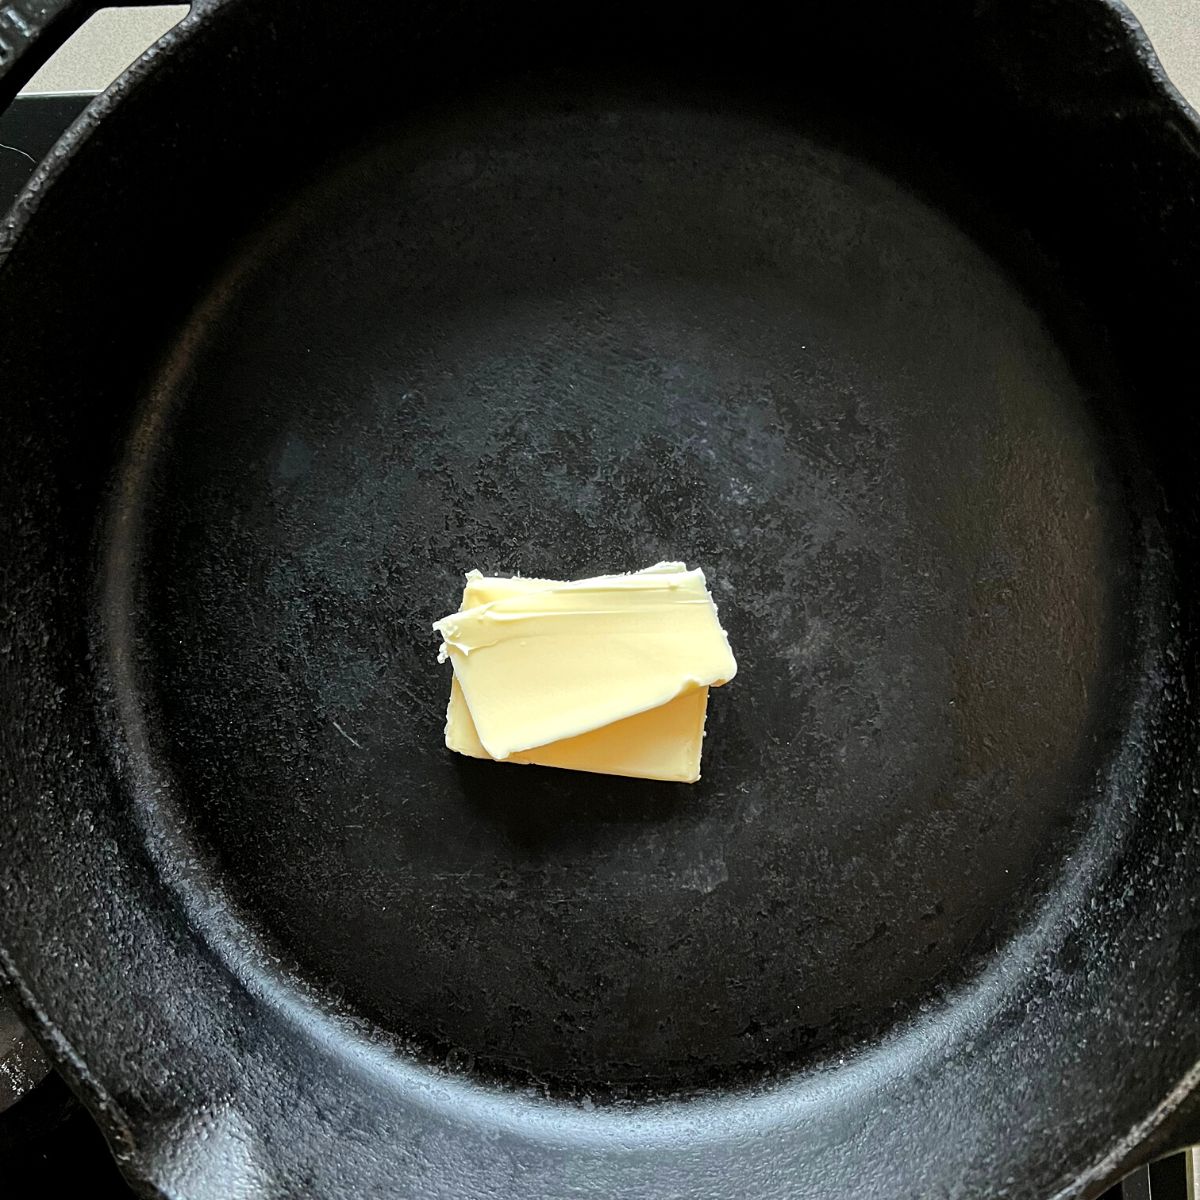
2. On medium heat, melt the butter in an oven proof skillet.
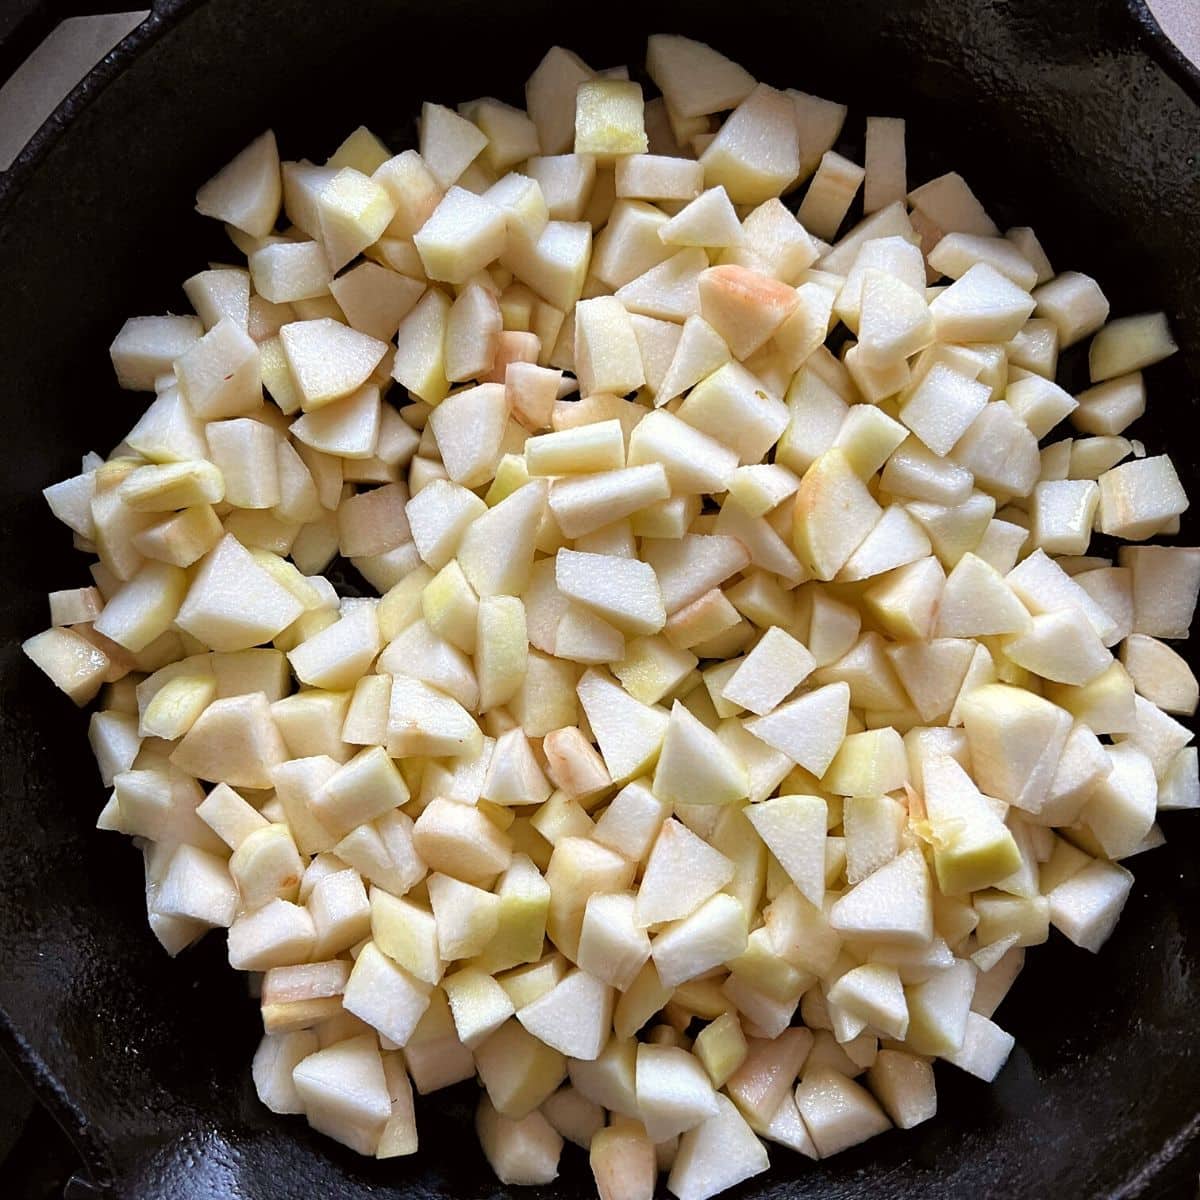
3. Add the diced pears to the skillet.

5. In a medium mixing bowl combine flour, sugar, baking powder and salt, then add the cubes of butter.
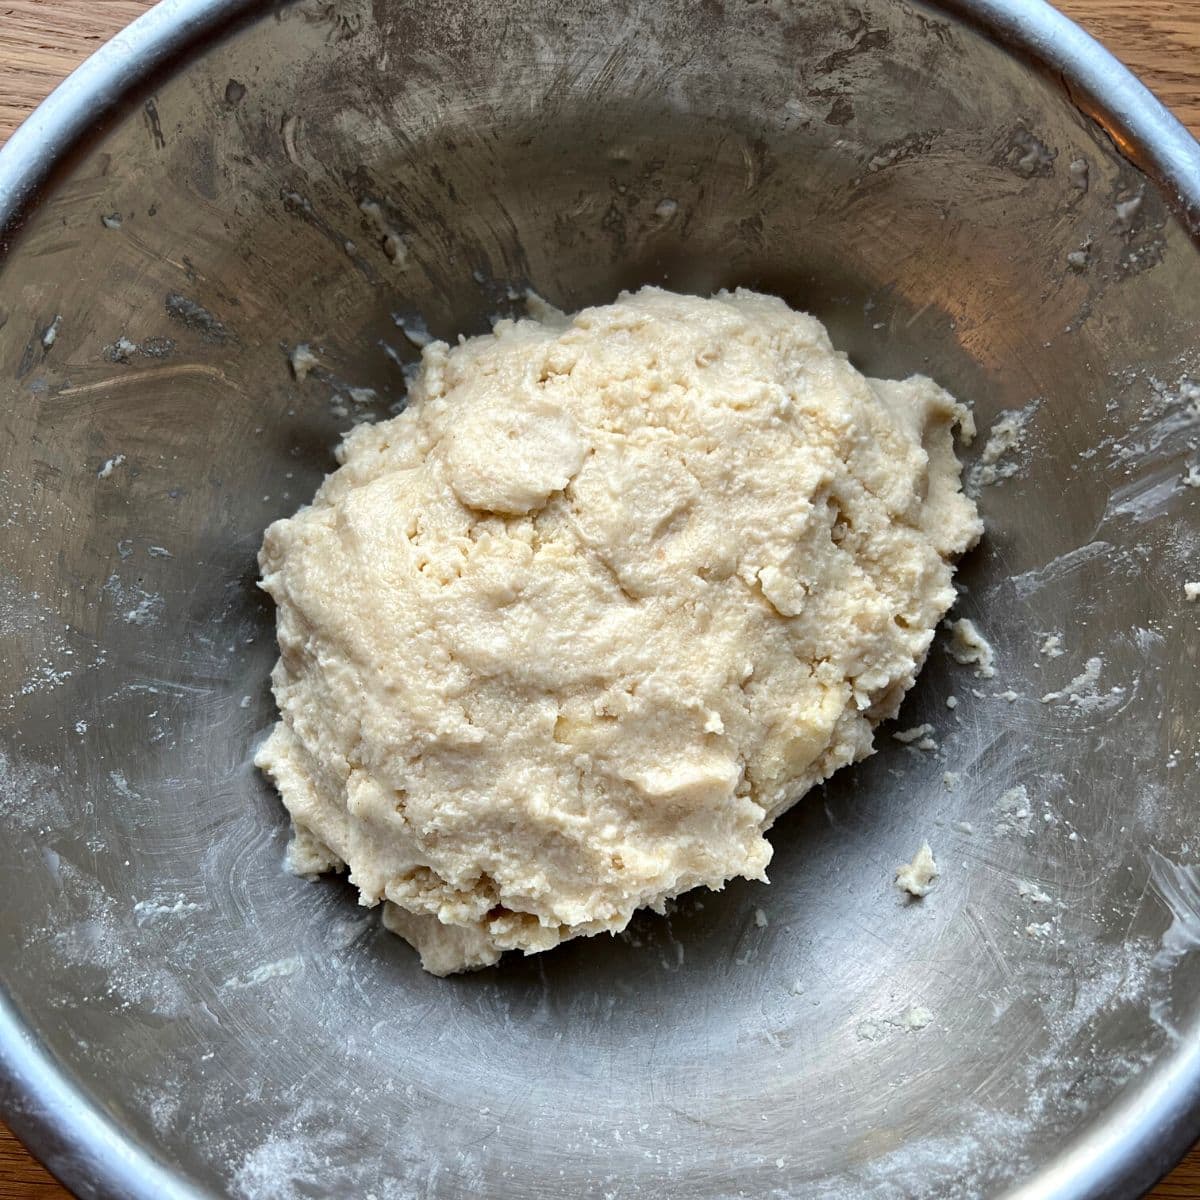
7. The biscuit dough will be soft and sticky so dampen hands to break off small pieces for the topping to prevent sticking.
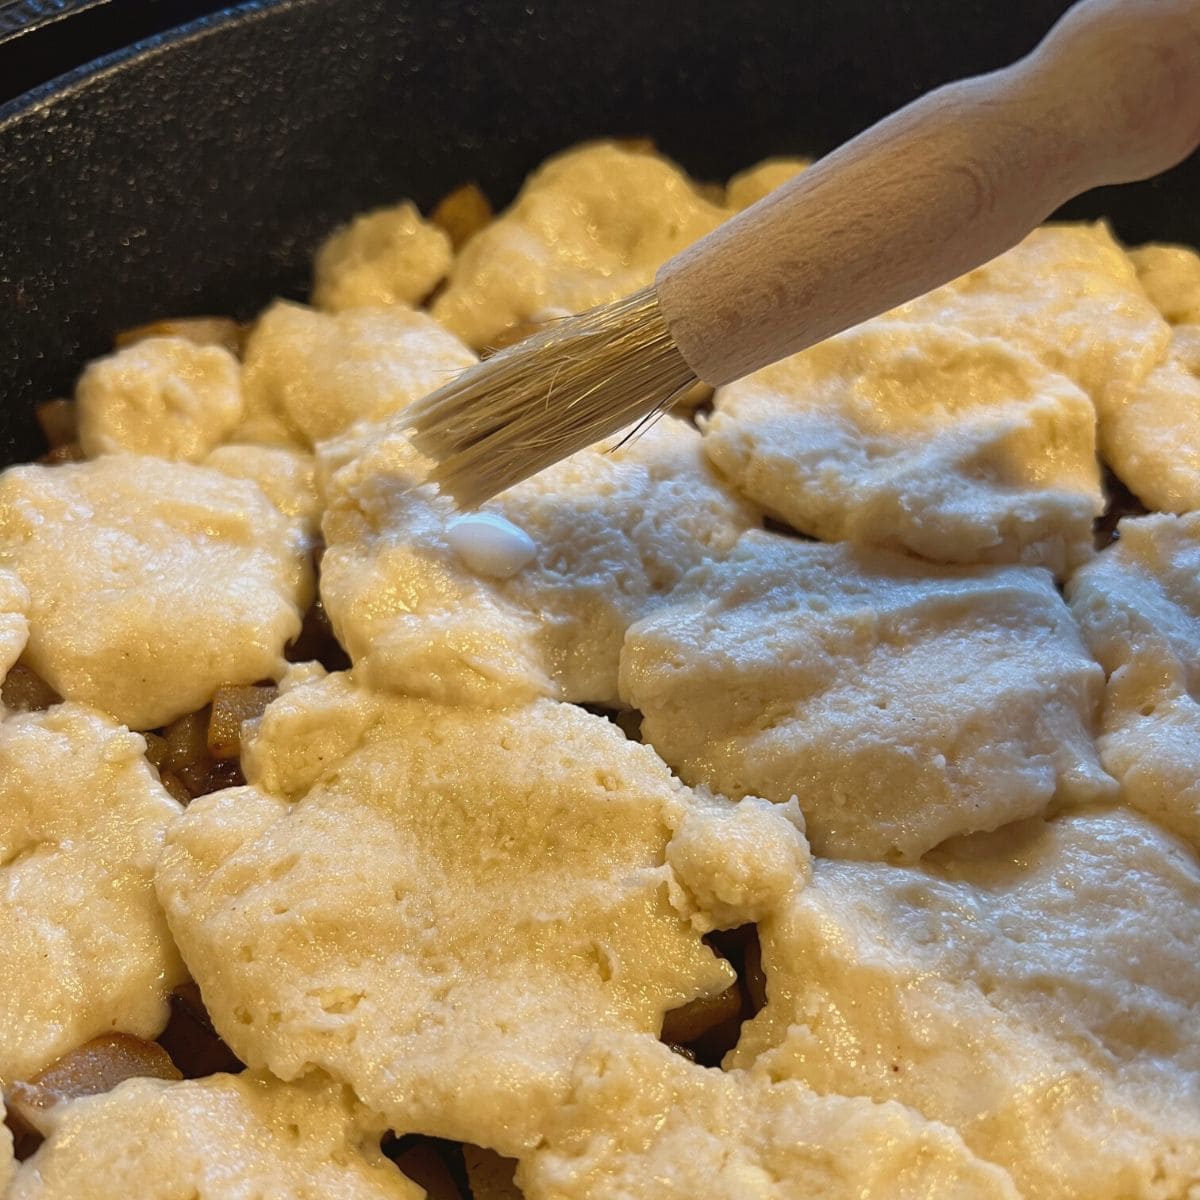
9. Dip a pastry brush in milk to glaze the topping.
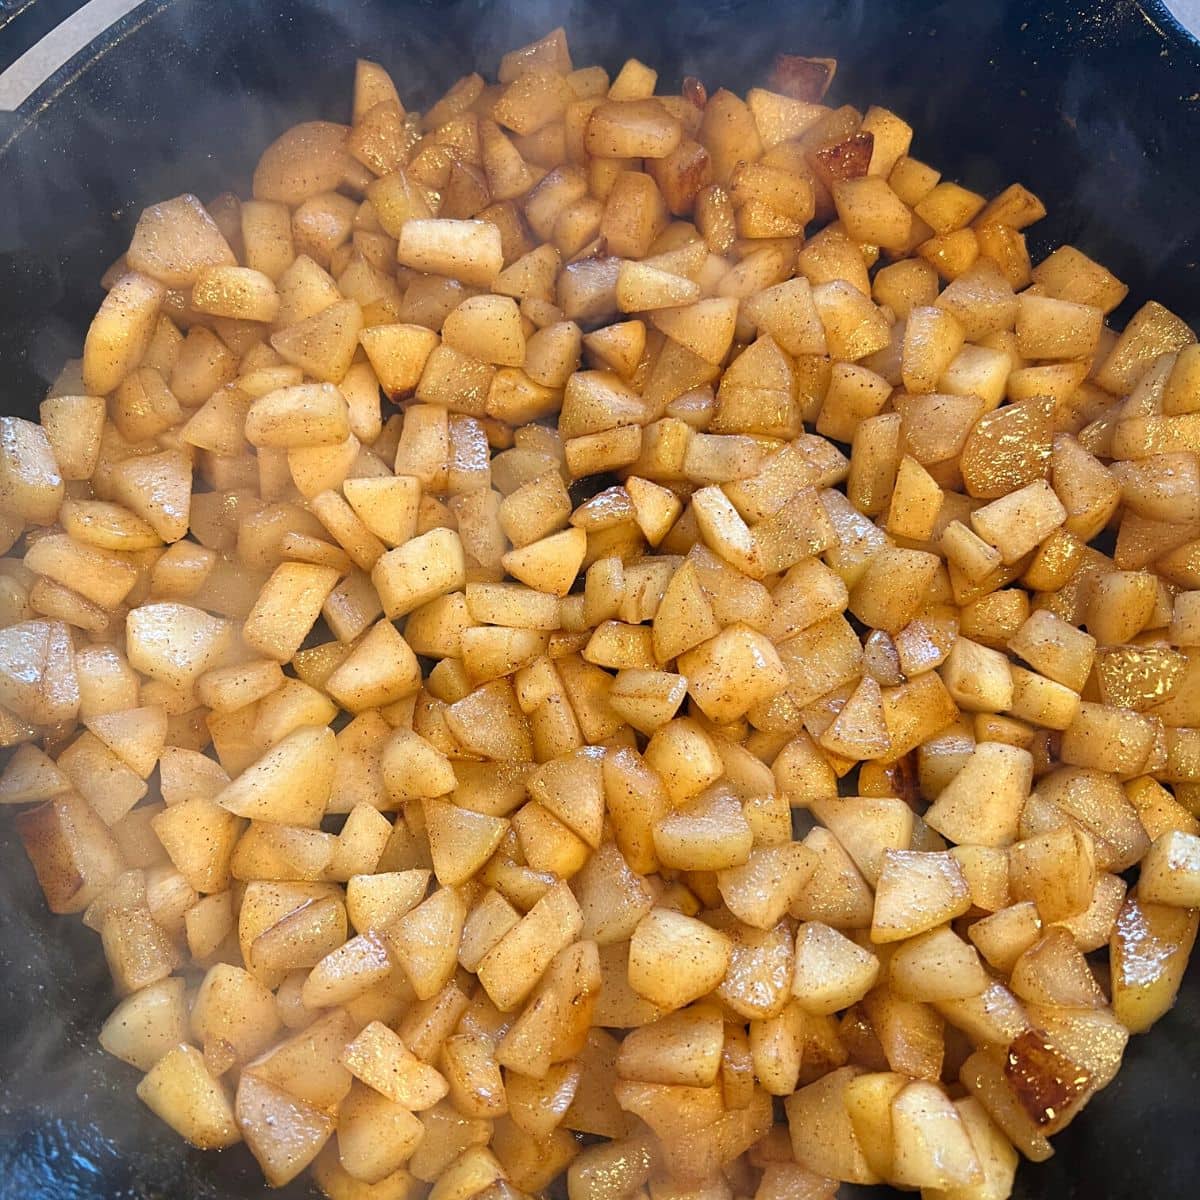
4. Mix in the sugar, lemon juice and cinnamon powder and stew the pears for 10 minutes.
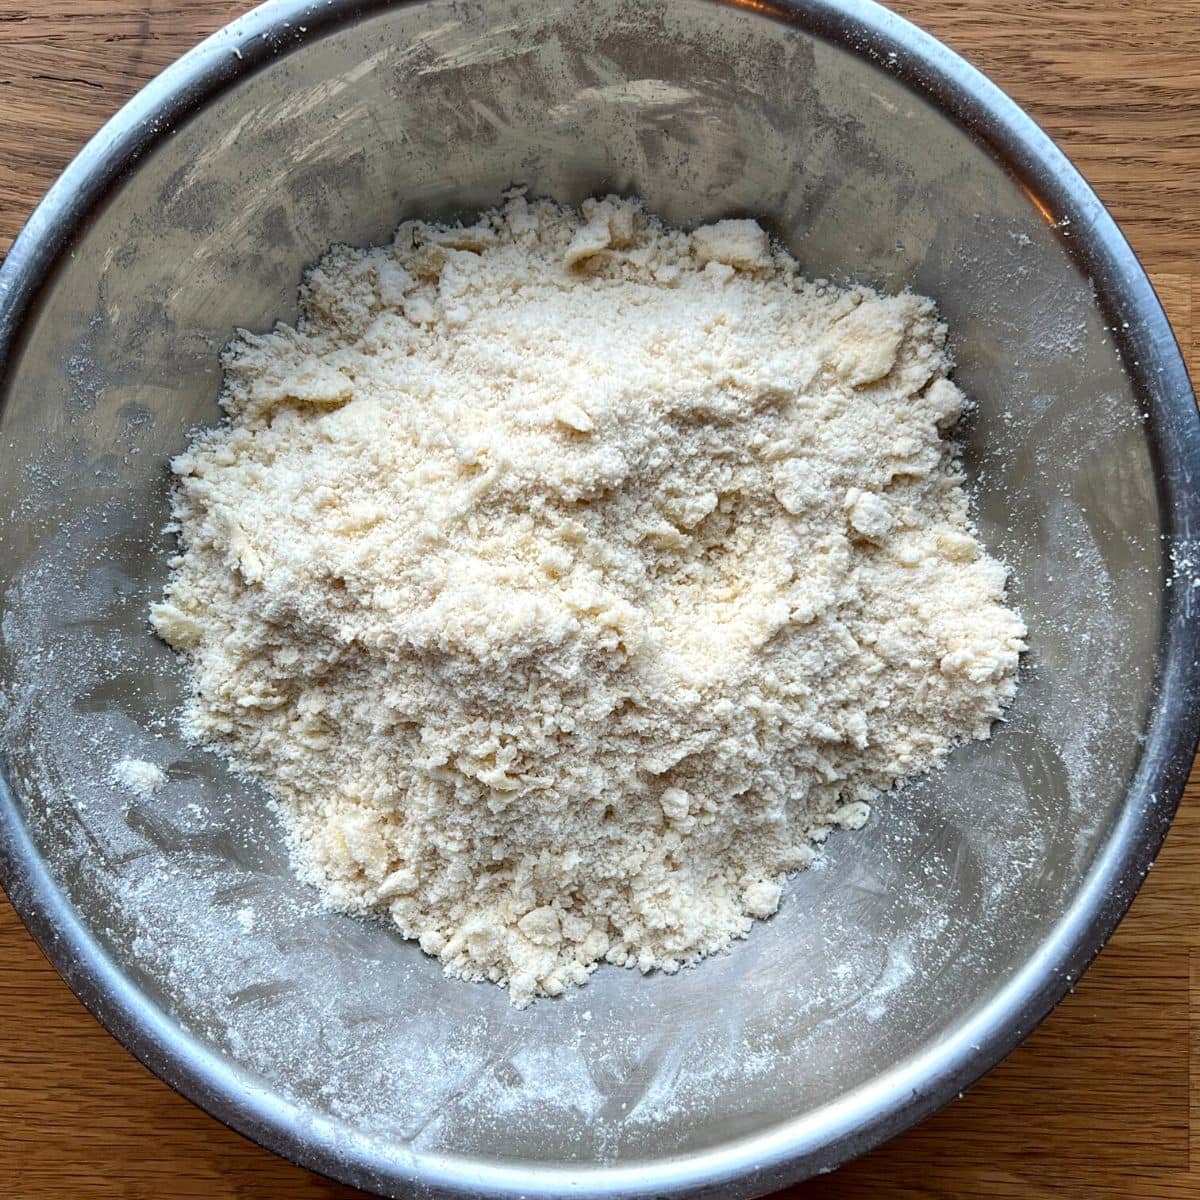
6. Rub the butter into the flour mixture to make a crumb.
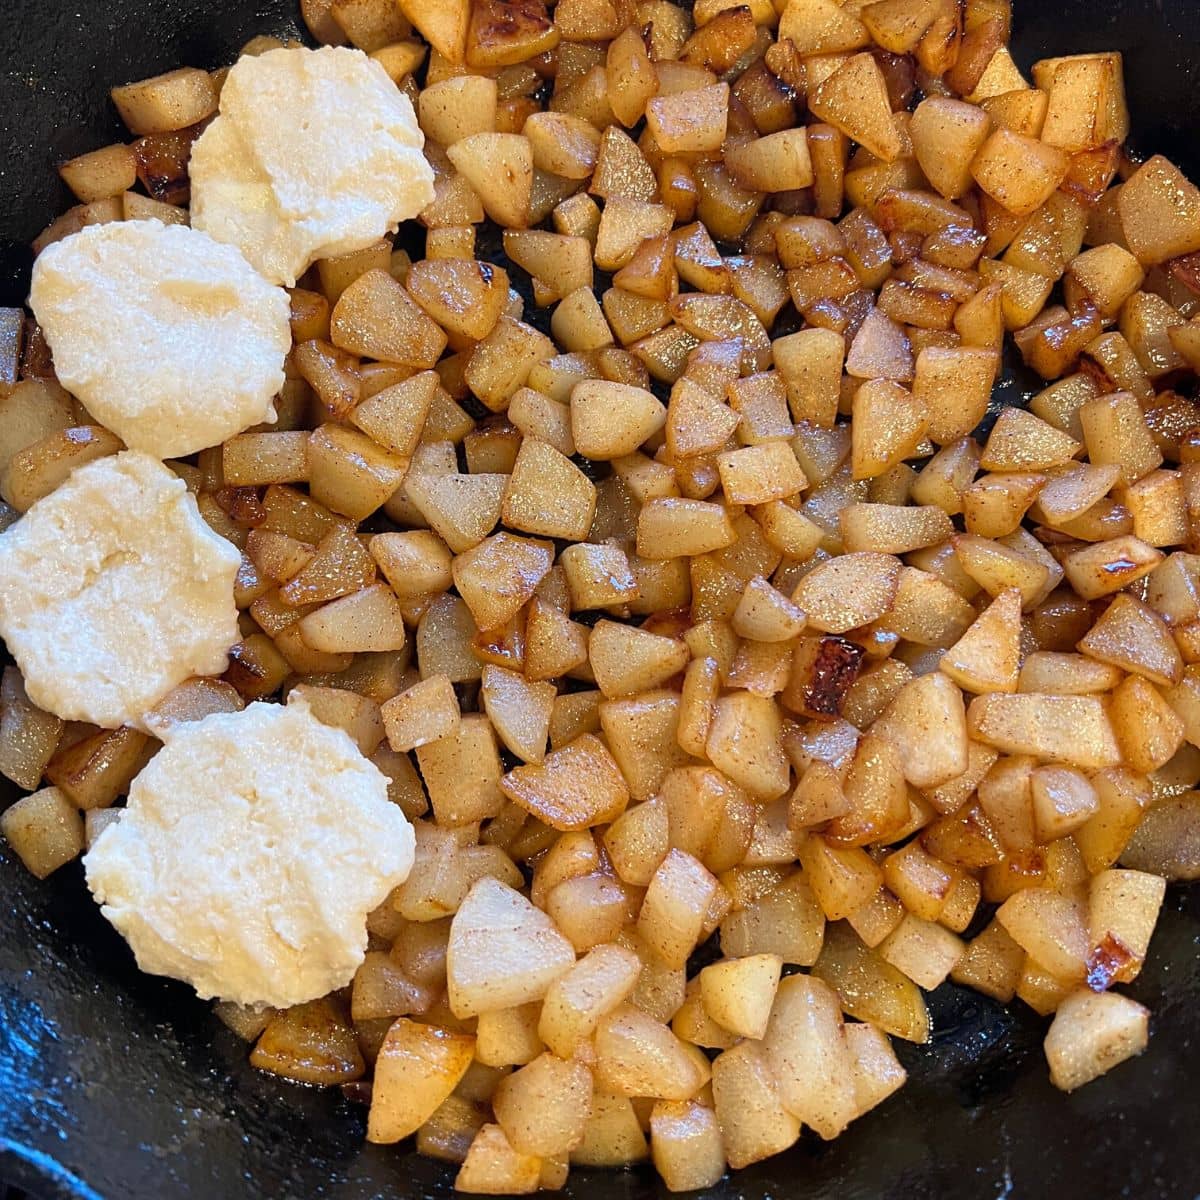
8. Make small balls, flatten between your hands and arrange the dough over the filling.
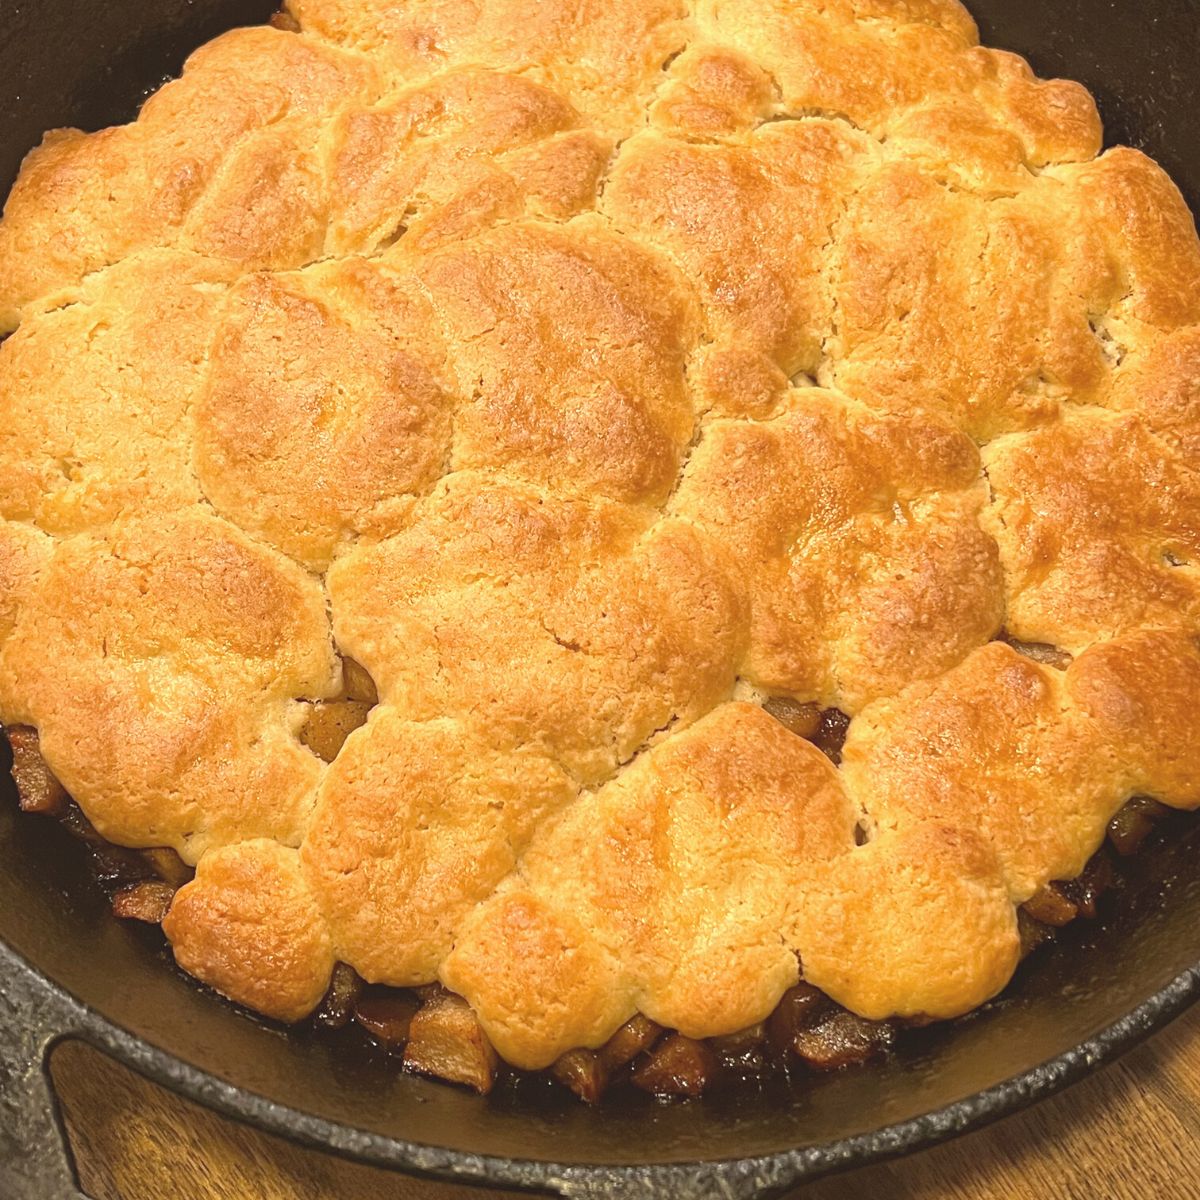
10. Bake for 45 minutes till biscuits turn golden.
Tip: The biscuit dough is ready once it comes together and is soft and still sticky, try not to over knead or it will become dense.
Variations
Here are a few ideas for extra ingredients you can add to tweak the recipe slightly.
- raisins – stew a handful along with the pears.
- crushed nuts – such as almonds, hazelnuts, pecans or pistachios, for extra texture. Sprinkle a handful over the stewed pears, before adding the biscuit dough and baking.
Serving
This pear cobbler is a perfect one skillet family dessert but can also be made in smaller ramekins. Keep an eye on them and they are done when the fruit mixture is bubbling and the biscuit topping has turned golden.
Serve warm with a scoop of vanilla ice cream or our Italian custard.
Storing leftovers
Cover and store leftovers in the fridge for up to 3 days.
We don’t recommend freezing pear cobbler as it makes the fruit mushy and biscuit topping soggy.
You may also like …
Did you make this? Please rate it in the recipe card below and if you are sharing a photo on social media please tag @endofthefork. Thanks!
Recipe
Pear Cobbler
Ingredients
Pear Filling
- pears - 6 cups, washed and diced 860 grams
- butter - salted 2 tablespoons
- light brown sugar - ¼ cup 50 grams
- lemon juice 2 teaspoons
- ground cinnamon 1 teaspoon
Biscuit Topping
- all purpose flour - 1½ cups levelled 190 grams
- sugar - ½ cup, white granulated 120 grams
- baking powder 1½ teaspoon
- salt - (only If using unsalted butter) ⅛ teaspoon
- butter - ½ cup, salted or unsalted, fridge cold and cut into cubes 110 grams
- buttermilk - ½ cup 130 mls
- buttermilk - to glaze 2 tablespoons
To Serve
- vanilla ice cream - to serve on top
Instructions
- Heat oven to 190°C/ 170°C fan/ 375°F and grease a 9 x 13 inch (33 x 23 cm) baking pan.
- On medium heat, melt 2 tablespoons butter in an oven proof skillet. Add 860 grams pears and mix in 50 grams light brown sugar, 2 teaspoons lemon juice and 1 teaspoon ground cinnamon . Stew for 10 minutes then remove from heat and set aside.
- In a medium mixing bowl combine 190 grams all purpose flour, 120 grams sugar, 1½ teaspoon baking powder and ⅛ teaspoon salt. Add cubes of 110 grams butter and rub into the flour mixture to make a crumb (like sand).
- Slowly drizzle 130 mls buttermilk into the crumb while mixing to form a soft and sticky dough.
- Dampen hands to prevent sticking then break off small pieces of dough making small balls, flatten between hands and place over the filling.
- Dip a pastry brush in 2 tablespoons buttermilk to glaze the dough and bake for 40-50 minutes, till biscuits turn golden. Serve the pear cobbler warm with a scoop of vanilla ice cream.
Notes
Inforation on ingredients:
- fresh pears – ripe pears are perfect but even slightly unripe are will do. Select pears that will have a slight bite and hold their shape when cooked such as the Anjou, Bartlett, Bosc, Concorde or Conference varieties.
- butter – we like to use salted butter to enhance the other flavours in the filling.
- light brown sugar – we tried this recipe using dark brown sugar and while it gave a delicious rich flavour it released more moisture and made the filling a little runny.
- lemon juice – for a little tanginess
- all purpose flour -no need to sift before using, simply scoop out then level the required amount.
- baking powder – make sure its in date! helps the biscuits rise and makes them airy and light.
- cold butter – we use salted butter to enhance the flavours here too. If using unsalted, add a pinch of salt to enhance the flavours.
- buttermilk – gives a soft and rich dough.
Only you will see your notes and you can edit them anytime.
Equipment
Nutrition
Nutritional information is calculated automatically per serving and accuracy cannot be guaranteed.
Content and photographs @ endofthefork.com are copyright protected. Sharing of this recipe is encouraged and appreciated, however copying and pasting full recipes to social media or other platforms is strictly prohibited.
Comments
No Comments